The pub hello_world() function implemented in the previous chapter is a very basic Rust function that returns the string “Hello Word”. Rust itself does not require a separate runtime environment. However, compiled Wasm binaries are designed to run on a Wasm runtime, and can communicate with the outside world only through that environment.
Therefore, in addition to Rust’s standard library, an additional library(e.g., wasm-bindgen) is required to bridge the interface with the execution environment. In a web browser — one of the primary execution environments for Wasm — actual functionality is achieved by accessing browser APIs through the JavaScript engine.
We will explore how to communicate with the JavaScript engine from your Rust-based WASM file using wasm-bindgen, and further examine how to pass results produced within a Wasm module to users by leveraging browser APIs. We will also cover how to use wasm-pack to create an efficient and integrated development environment. Following these stages, we will dive deeper into wasm_bindgen_futures to handle Rust’s asynchronous programming style alongside JavaScript’s Promise-based approach. Finally, we will look over web-sys and js-sys—the crates you will use most often to implement real-world apps with minimal JavaScript glue code, even though your Wasm code still accesses the browser DOM through the JavaScript world.
🔗1. Wasm-bindgen
Wasm-bindgen bridges Wasm modules and the JavaScript engine within your web browser.
🔗1.1 Wasm file with wasm_bindgen
New project with Cargo command
> cargo new --lib hello-worldLet’s replace the contents of Cargo.toml and src/lib.rs with the following code.
Cargo.toml
[package]
name = "hello-wasm"
version = "0.1.0"
edition = "2024"

[lib]
crate-type = ["cdylib"]

[dependencies]
chrono = "0.4"
wasm-bindgen = "0.2"
The difference from the previous Cargo.toml is that chrono and wasm-bindgen have been added to the dependencies. We use chrono to implement logic for fetching the current time, and wasm-bindgen is the core library that enables communication between the Rust-built Wasm module and the JavaScript runtime.
src/lib.rs
use chrono::Local;
use wasm_bindgen::prelude::*;

#[wasm_bindgen]
  extern "C" {
      fn alert(s: &str);
  }

#[wasm_bindgen]
  pub fn now() -> String {
      Local::now().to_rfc3339()
  }

#[wasm_bindgen]
  pub fn pop_message(msg: &str) {
      alert(msg)
  }

#[wasm_bindgen]
  pub fn add(a: f64, b: f64) -> f64 {
      a + b
  }
Functions annotated with the #[wasm_bindgen] attribute macro are intended to be called from JavaScript. You can see the now() function for returning the current time, pop_message(&str) for triggering a JavaScript alert(), and add(f64, f64) for performing addition.
Generating WASM file
❯ cargo build --release --target wasm32-unknown-unknown
  Finished `release` profile [optimized] target(s) in 0.16s
You should see target/wasm32-unknown-unknown/release/hello_wasm.wasm.
🔗1.2. Creating Java(Type)Script files with wasm-bindgen
wasm-bindgen serves as both a Rust crate and a CLI tool. As a crate, it handles the interoperability between the Wasm modules generated by the compiler and JavaScript. As a CLI tool, it automatically generates the necessary bindings and glue code, allowing you to seamlessly call your Wasm functions from JavaScript or TypeScript.
Installation
> cargo binstall wasm-bindgen-cliAlternatively, you can clone the code directly from the wasm-bindgen repository and build it yourself (which is the approach I personally prefer).
> git clone --depth 1 https://github.com/wasm-bindgen/wasm-bindgen.git && cd wasm-bindgen
> cargo build --release --package wasm-bindgen-cli
> install -s -Dm755 target/release/wasm-bindgen -t ~/.cargo/bin
Now, let’s use the wasm-bindgen command to generate the JavaScript(and/or TypeScript) bindings that will allow your browser to interface with the Wasm file we built earlier.
> wasm-bindgen ./target/wasm32-unknown-unknown/release/hello_wasm.wasm --target web --out-dir ./pkgSet --target to web and --out-dir to ./pkg. The output will be generated in the pkg directory.
❯ eza --tree pkg/
pkg
├── hello_wasm.d.ts
├── hello_wasm.js
├── hello_wasm_bg.wasm
└── hello_wasm_bg.wasm.d.ts
If you open pkg/hello_wasm.js, you will find the exported Wasm functions ready to be called directly from JavaScript. A major benefit of using wasm-bindgen is that developers don’t have to manually redefine function interfaces for JavaScript interoperability; the tool automatically generates all the complex glue code for you.
Now, it’s time to create the index.html file to see it in action. Create index.html in the project root, the same directory where your Cargo.toml is located.
index.html
<!DOCTYPE html>
<html>
<head>
<meta charset="utf-8">
<title>The Little Rust and Wasm Guide</title>
</head>
<body>
<script type="module">
import init, {now, pop_message}
from './pkg/hello_wasm.js';
async function run() {
await init();
pop_message("Current time is " + now());
}
run();
</script>
<h1>The Little Rust and Wasm Guide</h1>
<form id="sumForm">
<input type="number" id="num1" placeholder="First number" required>
<input type="number" id="num2" placeholder="Second number" required>
<button type="submit">Add</button>
</form>
<p>Result: <span id="result">0</span></p>
<script type="module">
import init, { add }
from './pkg/hello_wasm.js';
const form = document.getElementById('sumForm');
const resultDisplay = document.getElementById('result');
form.addEventListener('submit', (event) => {
event.preventDefault();
const val1 = document.getElementById('num1').value;
const val2 = document.getElementById('num2').value;
const sum = add(val1, val2);
resultDisplay.textContent = sum;
}
);
</script>
</body>
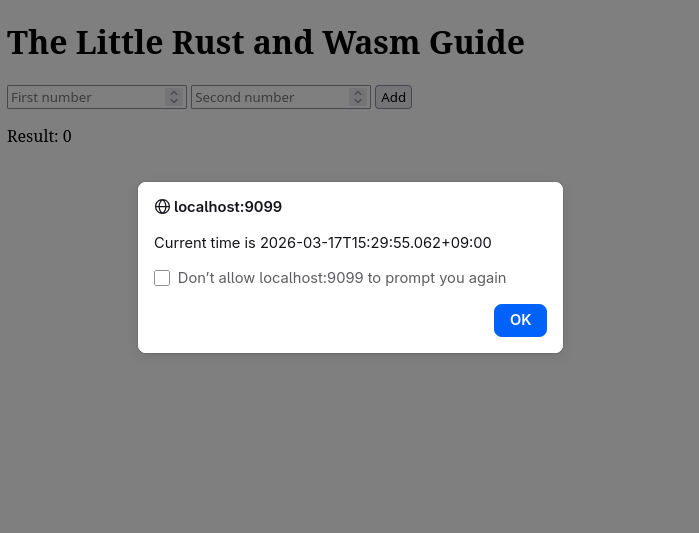
</html>` Now, let’s serve the HTML, JavaScript, and Wasm files we created using miniserve.
> miniserve -p 9099 --index index.html .Open your web browser and navigate to http://localhost:9099.
What is `miniserve`?
Miniserve: a CLI tool to serve files and dirs over HTTP
https://github.com/svenstaro/miniserve🔗2. wasm-pack
wasm-pack streamlines the development process by integrating various commands like cargo and ****wasm-bindgen into a single tool. If you use wasm-pack, there’s no need to install wasm-bindgen-cli separately, as it handles the underlying environment for you.“
🔗2.1 Installation
You can install wasm-pack using the official installer. Alternatively, you can build it from source if you prefer.
> git clone --depth 1 https://github.com/drager/wasm-pack.git && cd wasm-pack
> cargo build --release
> install -s -Dm755 target/release/wasm-pack -t ~/.cargo/bin
Once installed, you can view the usage instructions using the help command.
❯ wasm-pack help
📦 ✨ pack and publish your wasm!
Usage: wasm-pack [OPTIONS] <COMMAND>
Commands:
build 🏗️ build your npm package!
pack 🍱 create a tar of your npm package but don't publish!
new 🐑 create a new project with a template
publish 🎆 pack up your npm package and publish!
login 👤 Add an npm registry user account! (aliases: adduser, add-user)
test 👩🔬 test your wasm!
help Print this message or the help of the given subcommand(s)
Options:
-v, --verbose... Log verbosity is based off the number of v used
-q, --quiet No output printed to stdout
--log-level <LOG_LEVEL> The maximum level of messages that should be logged by wasm-pack. [possible values: info, warn, error] [default: info]
-h, --help Print help
-V, --version Print version🔗2.2. Create your project with “wasm-pack”
❯ wasm-pack new hello-wasm
[INFO]: ⬇️  Installing cargo-generate...
🐑  Generating a new rustwasm project with name 'hello-wasm'...
🔧   Destination: /tmp/hello-wasm ...
🔧   project-name: hello-wasm ...
🔧   Generating template ...
[ 1/14]   Done: .appveyor.yml
[ 2/14]   Done: .github/dependabot.yml
[ 3/14]   Done: .github
[ 4/14]   Done: .gitignore
[ 5/14]   Done: .travis.yml
[ 6/14]   Done: Cargo.toml
[ 7/14]   Done: LICENSE_APACHE
[ 8/14]   Done: LICENSE_MIT
[ 9/14]   Done: README.md
[10/14]   Done: src/lib.rs
[11/14]   Done: src/utils.rs
[12/14]   Done: src
[13/14]   Done: tests/web.rs
[14/14]   Done: tests
🔧   Moving generated files into: `/tmp/hello-wasm`...
🔧   Initializing a fresh Git repository
✨   Done! New project created /tmp/hello-wasm
[INFO]: 🐑 Generated new project at /hello-wasm
>
Generated project structure
❯ eza --tree hello-wasm
hello-wasm
├── Cargo.toml
├── LICENSE_APACHE
├── LICENSE_MIT
├── README.md
├── src
│   ├── lib.rs
│   └── utils.rs
└── tests
└── web.rs🔗2.3 Code
We will use the same Cargo.toml and src/lib.rs files created in the previous wasm-bindgen example.
🔗2.4 Build
Let’s perform the build using wasm-pack. By setting the –target to web, the generated files will be placed in the default ./pkg directory. Unlike using wasm-bindgen directly, there is no need to manually build the Wasm file with cargo beforehand; wasm-pack automatically handles both the Wasm compilation and the generation of JavaScript (and TypeScript) bindings in a single step
> wasm-pack build --target webGenerated files in ‘pkg’ folder after the build
❯ eza --tree pkg/
pkg
├── hello_wasm.d.ts
├── hello_wasm.js
├── hello_wasm_bg.js
├── hello_wasm_bg.wasm
├── hello_wasm_bg.wasm.d.ts
├── package.json
└── README.md🔗2.5 Calling from HTML and Viewing the Results
Create index.html with the same index.html file we created at wasm_bindgen example. Then check the result on your web browser .
You should see the same results as we did with wasm-bindgen. By integrating the tasks previously handled separately by Cargo and wasm-bindgen, wasm-pack significantly improves development efficiency.
🔗3. wasm_bindgen_futures
wasm_bindgen_futures bridges the gap between JavaScript Promises and Rust Futures.
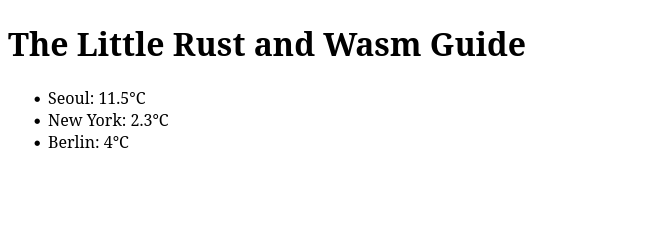
To demonstrate this, let’s build an example that fetches the current temperatures of Seoul, New York, and Berlin using the reqwest crate and the Open-Meteo API, then displays them in the browser.“
Cargo.toml
[package]
name = "hello-wasm"
version = "0.1.0"
edition = "2024"

[lib]
crate-type = ["cdylib"]

[dependencies]
reqwest = "0.13.2"
wasm-bindgen = "0.2.114"
wasm-bindgen-futures = "0.4.64"
src/lib.rs
use reqwest::{self, StatusCode};
use wasm_bindgen::prelude::*;

#[wasm_bindgen]
pub async fn get_http(url: String) -> Result<String, JsError> {
    let client = reqwest::Client::new();

    let res = client
        .get(&url)
        .send()
        .await
        .map_err(|e| JsError::new(&format!("Request failed: {}", e)))?;

    if res.status() == StatusCode::OK {
        let text = res
            .text()
            .await
            .map_err(|e| JsError::new(&format!("Text parse failed: {}", e)))?;
        return Ok(text);
    }

    Err(JsError::new(&format!("HTTP Error: {}", res.status())))
}
index.html
<!DOCTYPE html>
<html>
<head>
<meta charset="utf-8">
<title>The Little Rust and Wasm Guide</title>
</head>
<body>
<script type="module">
import init, {get_http}
from './pkg/hello_wasm.js';
const cities = [
{ name: "Seoul", url: "https://api.open-meteo.com/v1/forecast?latitude=37.566&longitude=126.9784¤t=temperature_2m&timezone=Asia%2FTokyo"},
{ name: "NewYork", url: "https://api.open-meteo.com/v1/forecast?latitude=40.7143&longitude=-74.006¤t=temperature_2m&timezone=Asia%2FTokyo"},
{ name: "Berlin", url: "https://api.open-meteo.com/v1/forecast?latitude=52.5244&longitude=13.4105¤t=temperature_2m&timezone=Asia%2FTokyo"},
]
async function run() {
await init();
for (const city of cities) {
try {
const weather = JSON.parse(await get_http(city.url));
const temp = weather.current.temperature_2m;
const unit = weather.current_units.temperature_2m;
document.getElementById(city.name).innerText = `${temp}${unit}`;
} catch (err) {
console.error("Rust Error:", err);
}
}
}
run();
</script>
<h1>The Little Rust and Wasm Guide</h1>
<ul>
<li>Seoul: <span id="Seoul">Loading...</span></li>
<li>New York: <span id="NewYork">Loading...</span></li>
<li>Berlin: <span id="Berlin">Loading...</span></li>
</ul>
</body>
</html>Open your web browser and navigate to http://localhost:9099.